“You only made eight cookies?” My husband stared at the baking sheet like I’d personally offended him. It was a Tuesday night, and I’d just pulled a single, perfect tray of chocolate chip cookies from the oven. He was used to the industrial-sized batches I usually make for parties or holiday gifting. But this wasn’t for a party. This was for us. It was 9 PM, we were both tired, and I had a craving that wouldn’t quit. I didn’t need three dozen cookies staring at me from the counter, tempting me for the next week. I needed exactly eight warm, gooey, perfectly crisped-around-the-edges cookies. And honestly? It was the most satisfying baking decision I’ve made in a long time.
That little batch changed how I think about dessert. It felt less like a project and more like a small, deliberate act of kindness for myself. There’s something almost luxurious about making just enough for the moment. No Tupperware required. No guilt about the half-eaten container lurking in the pantry three days later. This recipe for perfect small-batch chocolate chip cookies delivers everything you love about the classic—the buttery toffee notes, the soft centers, the crisp edges—without committing you to a week’s worth of temptation.
I’ve tested this more times than I care to admit. Some batches were too flat. Some were too cakey. One memorable failure involved me confusing baking soda with baking powder (don’t ask). But this version? It’s the one I keep coming back to. It’s the one that makes me feel like I’ve got my baking life together, even on a random Tuesday. And I think you’ll feel the same way.
Why You’ll Love This Recipe
Let me tell you why this isn’t just another cookie recipe. I’ve been developing and testing recipes for years, and this one came from a very specific need: I wanted a cookie that tasted like it came from a bakery but required almost no effort. After about six batches (and one very patient husband who acted as my official taste-tester), I nailed it.
- Quick & Easy: From start to finish, these cookies are ready in under 30 minutes. No chilling required. I know, I know—every cookie expert says you must chill the dough. But sometimes you just want a cookie now, and this recipe delivers.
- Simple Ingredients: You probably have everything you need in your kitchen right now. Butter, sugar, an egg, flour, chocolate chips. That’s it. No weird specialty ingredients or trips to the store.
- Perfect for Small Cravings: This is the ultimate recipe for when you want something sweet but don’t want to be tempted by a giant batch. It’s also great for when you’re cooking for one or two people.
- Consistently Perfect: I’ve made these cookies for myself, for neighbors, and for last-minute dessert emergencies. They turn out the same way every single time—golden edges, soft centers, and that irresistible crackly top.
- No Leftover Guilt: Let’s be real. If I make a full batch of cookies, I will eat them all within 48 hours. This recipe solves that problem. You get your cookie fix, and then they’re gone. It’s a beautiful thing.
What makes this recipe different from the hundreds of other chocolate chip cookie recipes out there? It’s the ratio. I’ve tweaked the butter-to-sugar-to-flour balance so that you get that perfect texture without needing to chill the dough or use any special techniques. It’s foolproof. And it’s designed for one thing: making you incredibly happy in the shortest amount of time possible.
What Ingredients You Will Need
This recipe uses simple, everyday ingredients to create something truly special. The magic happens when these humble components come together in just the right proportions. Here’s what you’ll need:
- Unsalted butter, melted and slightly cooled (4 tablespoons / 57g) — I use unsalted so I can control the salt level. Melting the butter gives these cookies a chewier texture and deeper flavor. Let it cool for a couple of minutes so it doesn’t cook the egg when you mix them together.
- Granulated sugar (3 tablespoons / 38g) — Adds sweetness and helps create those crispy edges. I’ve tried reducing the sugar, but honestly, it throws off the texture.
- Light brown sugar, packed (3 tablespoons / 43g) — This is where the magic happens. Brown sugar adds moisture and that subtle molasses flavor that makes chocolate chip cookies taste so rich. I prefer light brown sugar, but dark brown works too if you want a deeper flavor.
- One large egg yolk — Just the yolk, not the whole egg. Using only the yolk gives you a richer, chewier cookie without making the dough too wet. Save the egg white for scrambled eggs the next morning!
- Vanilla extract (½ teaspoon) — Pure vanilla extract makes a difference here. I’ve used imitation in a pinch, but the real stuff really shines in a small batch where every ingredient matters.
- All-purpose flour (½ cup + 1 tablespoon / 75g) — Standard all-purpose flour works perfectly. Spoon it into your measuring cup and level it off—don’t scoop directly from the bag or you’ll end up with too much flour and dry cookies.
- Baking soda (¼ teaspoon) — Just enough to give the cookies a little lift without making them puffy. Make sure your baking soda is fresh—it loses potency over time.
- Salt (¼ teaspoon) — Salt balances the sweetness and enhances the chocolate flavor. I use fine sea salt for the dough and sometimes sprinkle a little flaky salt on top before baking.
- Semi-sweet chocolate chips (⅓ cup / 60g) — I prefer semi-sweet because it’s not too sweet and not too bitter. Ghirardelli is my go-to brand, but any good-quality chip will work. You can also chop up a chocolate bar for those beautiful irregular chunks—that’s what I do when I’m feeling fancy.
Equipment Needed
You don’t need a fancy kitchen to make these cookies. Here’s what you’ll need:
- Mixing bowls: One medium bowl for the wet ingredients and one small bowl for the dry ingredients. Nothing fancy—I use the same set I’ve had for years.
- Whisk or wooden spoon: A whisk works great for combining the wet ingredients, and a wooden spoon or rubber spatula works for folding in the flour and chocolate chips.
- Measuring cups and spoons: Accurate measurements are key for a small batch. I recommend using dry measuring cups for the flour and sugar, and liquid measuring cups if you’re scaling up.
- Baking sheet: A standard half-sheet pan works perfectly. I line mine with parchment paper for easy cleanup and to prevent sticking.
- Cookie scoop or tablespoon: A 1.5-tablespoon cookie scoop makes perfectly uniform cookies, but you can also use a regular tablespoon. Just make sure you’re scooping evenly sized portions.
- Cooling rack: Not strictly necessary, but it helps the cookies cool evenly and prevents soggy bottoms.
If you don’t have a cookie scoop, don’t worry. I’ve used a regular spoon for years before I finally invested in one. The cookies might look slightly different sizes, but they’ll taste just as good.
Preparation Method
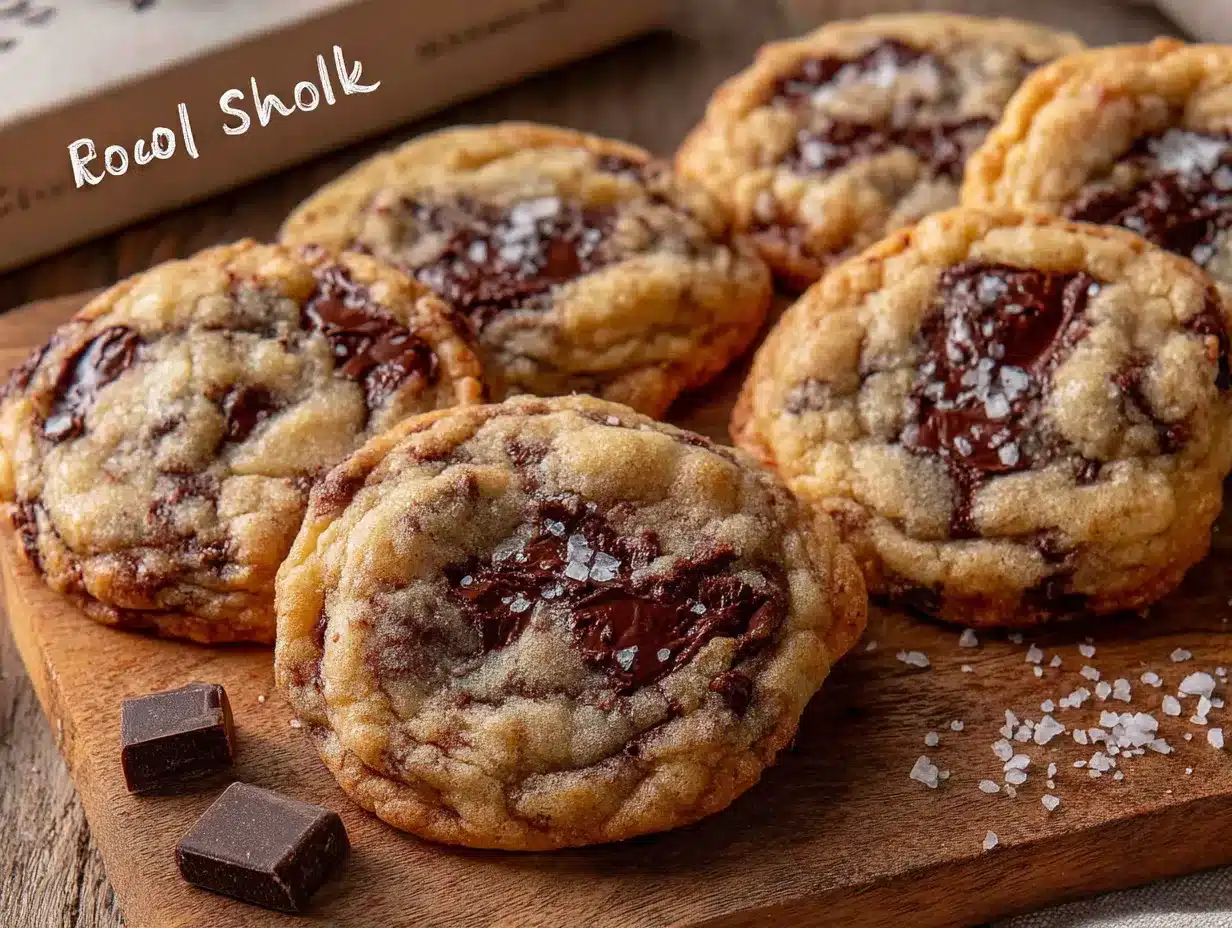
Alright, let’s get to the good part. Follow these steps, and you’ll have warm, perfect cookies in no time.
- Preheat your oven to 350°F (175°C). Line a baking sheet with parchment paper. This is important—parchment paper ensures even baking and makes cleanup a breeze. I’ve used silicone baking mats too, and they work well, but I prefer parchment for the crispier bottoms.
- Melt the butter. In a medium microwave-safe bowl, melt 4 tablespoons of unsalted butter in 20-second bursts until just melted. Let it cool for 2-3 minutes. You want it warm, not hot. If it’s too hot, it will cook the egg yolk when you mix them together, and nobody wants scrambled egg in their cookie dough.
- Mix the sugars and butter. Add 3 tablespoons granulated sugar and 3 tablespoons packed light brown sugar to the melted butter. Whisk vigorously for about 30 seconds until the mixture looks smooth and slightly thickened. This is where you start to smell that amazing buttery caramel aroma.
- Add the egg yolk and vanilla. Drop in the egg yolk and ½ teaspoon vanilla extract. Whisk until everything is well combined and the mixture looks glossy. It should smell incredible at this point—like the beginning of something wonderful.
- Combine the dry ingredients. In a separate small bowl, whisk together ½ cup + 1 tablespoon all-purpose flour, ¼ teaspoon baking soda, and ¼ teaspoon salt. Make sure there are no lumps. I like to use a fork for this if I’m too lazy to get out a whisk.
- Mix the dry ingredients into the wet. Add the flour mixture to the butter mixture. Stir with a rubber spatula or wooden spoon until just combined. Don’t overmix! Stop as soon as you don’t see any more streaks of flour. Overmixing develops gluten and makes cookies tough.
- Fold in the chocolate chips. Add ⅓ cup semi-sweet chocolate chips and fold them in gently. Make sure they’re evenly distributed throughout the dough. If you’re feeling extra, you can reserve a few chips to press onto the tops of the dough balls before baking—it makes them look prettier.
- Scoop the dough. Using a 1.5-tablespoon cookie scoop or a regular tablespoon, scoop the dough into 8 equal portions. Place them on the prepared baking sheet, spacing them about 2 inches apart. They will spread, so give them room.
- Bake. Bake for 9-11 minutes, or until the edges are golden brown and the centers look slightly puffy and underdone. The tops should look crackly and set. Remember: they continue to bake on the hot baking sheet after you take them out of the oven, so it’s better to underbake slightly than overbake.
- Cool. Let the cookies cool on the baking sheet for 5 minutes. This is the hardest part, I know. But trust me—they need this time to set up properly. After 5 minutes, transfer them to a wire rack to cool completely, or eat them warm. I won’t judge you if you eat one immediately.
One thing I’ve learned the hard way: if you want that perfect bakery-style look, gently press a few extra chocolate chips into the tops of the warm cookies right when they come out of the oven. It makes them look gorgeous and ensures every bite has plenty of chocolate.
Cooking Tips & Techniques
I’ve made these cookies more times than I can count, and I’ve learned a few things along the way. Here are my best tips for perfect small-batch chocolate chip cookies every time.
Don’t skip the cooling step. I know it’s tempting to eat them right away, but letting the cookies cool on the baking sheet for 5 minutes is crucial. They continue to bake from the residual heat, and the structure sets up properly. If you try to move them too soon, they’ll fall apart. I learned this the hard way when I tried to transfer a batch immediately and ended up with a cookie crumble situation.
Use room temperature ingredients. Your egg yolk should be at room temperature for best results. If you forgot to take it out of the fridge, place it in a bowl of warm water for 5 minutes. This helps it incorporate more smoothly into the butter mixture.
Measure flour correctly. The most common mistake people make is using too much flour. Always spoon the flour into your measuring cup and level it off with a knife. Don’t scoop directly from the bag—you’ll pack in too much flour and end up with dry, cakey cookies.
Watch the oven like a hawk. Ovens vary wildly. My oven runs a bit hot, so I start checking at 8 minutes. Look for golden edges and puffy, slightly underdone centers. The cookies will look a bit pale and soft in the middle—that’s exactly what you want.
If your cookies spread too much, your butter might have been too warm, or your baking sheet might have been hot from a previous batch. Let the baking sheet cool completely between batches, and make sure your melted butter has cooled slightly before mixing.
For extra flavor, try browning the butter before using it. Melt the butter in a small saucepan over medium heat, swirling occasionally, until it turns golden brown and smells nutty. Let it cool slightly before proceeding. This adds a deep, toffee-like flavor that takes these cookies to another level. I did this once on a whim, and now I can’t go back.
Variations & Adaptations
One of the best things about this recipe is how adaptable it is. Here are some of my favorite variations:
Gluten-Free Version: Substitute the all-purpose flour with a 1:1 gluten-free baking flour blend. I’ve used Bob’s Red Mill with great success. The texture might be slightly different, but they’re still delicious. Just make sure your blend contains xanthan gum for structure.
Double Chocolate Chip: Swap 1 tablespoon of flour for 1 tablespoon of unsweetened cocoa powder. Use white chocolate chips or milk chocolate chips instead of semi-sweet. You get a rich, fudgy chocolate cookie that’s dangerously good. I made these for a friend who’s a chocolate fanatic, and she said they were the best cookies she’d ever had.
Add-In Variations: Feel free to get creative with your mix-ins. Try chopped walnuts or pecans for crunch, dried cherries or cranberries for tartness, or even crushed pretzels for a sweet-salty combo. I once added a handful of chopped dark chocolate and some flaky sea salt on top, and it was heavenly.
Vegan Option: Use vegan butter (I like Miyoko’s) and replace the egg yolk with 1 tablespoon of aquafaba (the liquid from a can of chickpeas) mixed with 1 teaspoon of cornstarch. The texture won’t be exactly the same, but it’s a solid vegan alternative.
Brown Butter Version: As I mentioned earlier, browning the butter adds incredible depth. Just be careful not to burn it. Let it cool completely before mixing with the sugars. The cookies will have a nutty, almost caramel-like flavor that pairs beautifully with the chocolate.
Serving & Storage Suggestions
These cookies are best enjoyed warm, straight from the oven. But here’s how to serve and store them for maximum enjoyment.
Serving: Serve these cookies warm with a glass of cold milk or a scoop of vanilla ice cream for an extra treat. I also love them with a cup of coffee or tea in the afternoon. If you’re feeling fancy, drizzle a little melted chocolate over the top or sprinkle with flaky sea salt just before serving.
Storage: Store leftover cookies in an airtight container at room temperature for up to 3 days. They’ll stay soft and chewy. If you want to keep them longer, you can freeze the baked cookies for up to 2 months. Just wrap them individually in plastic wrap and place them in a freezer bag.
Reheating: To bring back that fresh-from-the-oven texture, pop a cookie in the microwave for 10-15 seconds. Or, reheat them in a 300°F (150°C) oven for 5 minutes. The oven method gives you slightly crispier edges.
Freezing the Dough: This is my favorite trick. Scoop the dough into balls and place them on a parchment-lined baking sheet. Freeze until solid, then transfer to a freezer bag. You can bake them straight from frozen—just add 2-3 minutes to the baking time. This way, you can have fresh cookies whenever the craving strikes.
If you’re looking for other quick and satisfying treats, you might enjoy these easy no-bake peanut butter oat energy balls for a healthier option, or these creamy frozen banana peanut butter chocolate chip ice cream for another small-batch dessert idea.
Nutritional Information & Benefits
Let’s be real—these cookies are a treat. But here’s the nutritional breakdown for one cookie (based on 8 cookies per batch):
- Calories: Approximately 180 per cookie
- Fat: 11g
- Carbohydrates: 22g
- Protein: 2g
- Sugar: 14g
These cookies are made with real butter and sugar, so they’re not exactly health food. But they’re made from scratch with simple, recognizable ingredients. The small batch size means you’re less likely to overindulge. And honestly? Sometimes you just need a cookie, and that’s okay.
If you’re looking for a healthier alternative, you could try these easy high-protein turkey pinwheel wraps for a savory option, or these creamy peanut butter banana overnight oats for a nutritious breakfast.
Conclusion
These perfect small-batch chocolate chip cookies are proof that you don’t need a huge batch to get that warm, satisfying feeling of homemade cookies. They’re quick, easy, and designed for those moments when you just need a little something sweet without the commitment of three dozen cookies staring at you from the counter.
I love this recipe because it’s forgiving. It works when you’re tired, when you’re in a hurry, and when you just want something that tastes like home. It’s the recipe I turn to when I’ve had a long day and need a small victory. And honestly? It never lets me down.
I’d love to hear how these turn out for you. Did you add any fun mix-ins? Did you brown the butter? Did you eat three before they even cooled? (No judgment here.) Drop a comment below and let me know. And if you’re looking for more small-batch baking inspiration, check out these moist brown butter chocolate chip zucchini bread or these brown butter chocolate chip cookies with flaky sea salt for another take on this classic treat.
Happy baking, friend. You deserve a warm cookie.
Frequently Asked Questions
Can I make this recipe with whole wheat flour?
Yes, you can substitute up to half of the all-purpose flour with whole wheat flour. The cookies will be slightly denser and have a nuttier flavor. If you use 100% whole wheat flour, the texture will be much heavier and less tender.
Why did my cookies turn out flat?
Flat cookies usually mean your butter was too warm or you used too much sugar. Make sure your melted butter has cooled slightly before mixing, and measure your ingredients accurately. Also, check that your baking soda is fresh—old baking soda won’t give enough lift.
Can I double this recipe?
Absolutely! Double all the ingredients to make 16 cookies. Just use one whole egg instead of two egg yolks if you want a slightly different texture. The baking time should remain about the same, but keep an eye on them.
How do I get that bakery-style crackly top?
The crackly top comes from the right ratio of butter to sugar and not overmixing the dough. Also, making sure your oven is properly preheated helps create that initial burst of heat that sets the top. If your cookies aren’t crackly, try increasing the oven temperature by 25°F.
Can I use margarine instead of butter?
I don’t recommend it. Butter provides flavor and texture that margarine can’t replicate. If you’re dairy-free, use a high-quality vegan butter stick (not spreadable margarine) for the best results. The texture will be slightly different, but it’ll still be good.
Pin This Recipe!
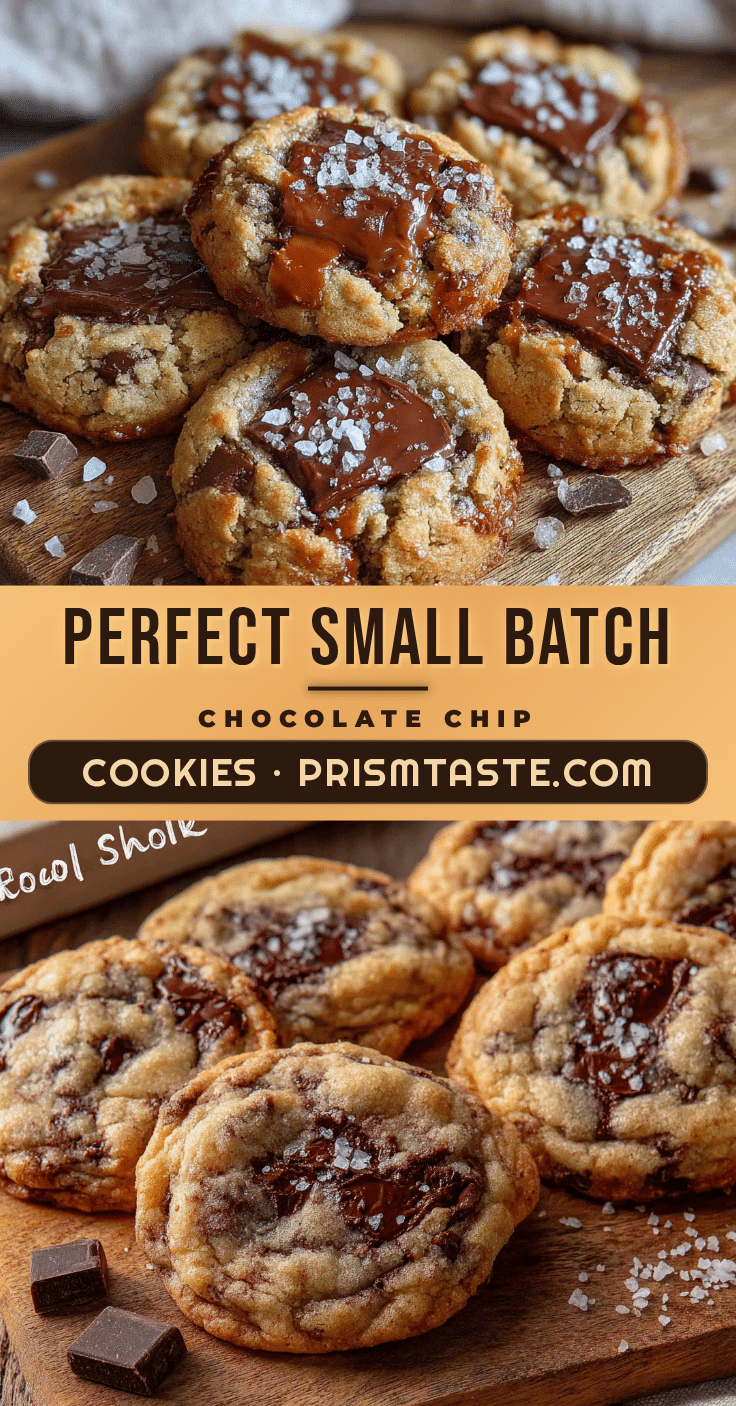
Perfect Small-Batch Chocolate Chip Cookies: Easy Recipe

These perfect small-batch chocolate chip cookies deliver everything you love about the classic—the buttery toffee notes, the soft centers, the crisp edges—without committing you to a week’s worth of temptation. Ready in under 30 minutes with no chilling required.
- Prep Time: 10 minutes
- Cook Time: 10 minutes
- Total Time: 20 minutes
- Yield: 8 cookies 1x
- Category: Dessert
- Cuisine: American
Ingredients
- 4 tablespoons (57g) unsalted butter, melted and slightly cooled
- 3 tablespoons (38g) granulated sugar
- 3 tablespoons (43g) light brown sugar, packed
- 1 large egg yolk
- ½ teaspoon vanilla extract
- ½ cup + 1 tablespoon (75g) all-purpose flour
- ¼ teaspoon baking soda
- ¼ teaspoon salt
- ⅓ cup (60g) semi-sweet chocolate chips
Instructions
- Preheat your oven to 350°F (175°C). Line a baking sheet with parchment paper.
- Melt the butter. In a medium microwave-safe bowl, melt 4 tablespoons of unsalted butter in 20-second bursts until just melted. Let it cool for 2-3 minutes.
- Mix the sugars and butter. Add 3 tablespoons granulated sugar and 3 tablespoons packed light brown sugar to the melted butter. Whisk vigorously for about 30 seconds until the mixture looks smooth and slightly thickened.
- Add the egg yolk and vanilla. Drop in the egg yolk and ½ teaspoon vanilla extract. Whisk until everything is well combined and the mixture looks glossy.
- Combine the dry ingredients. In a separate small bowl, whisk together ½ cup + 1 tablespoon all-purpose flour, ¼ teaspoon baking soda, and ¼ teaspoon salt.
- Mix the dry ingredients into the wet. Add the flour mixture to the butter mixture. Stir with a rubber spatula or wooden spoon until just combined. Don’t overmix!
- Fold in the chocolate chips. Add ⅓ cup semi-sweet chocolate chips and fold them in gently.
- Scoop the dough. Using a 1.5-tablespoon cookie scoop or a regular tablespoon, scoop the dough into 8 equal portions. Place them on the prepared baking sheet, spacing them about 2 inches apart.
- Bake. Bake for 9-11 minutes, or until the edges are golden brown and the centers look slightly puffy and underdone.
- Cool. Let the cookies cool on the baking sheet for 5 minutes. After 5 minutes, transfer them to a wire rack to cool completely, or eat them warm.
Notes
Don’t skip the cooling step on the baking sheet for 5 minutes. Use room temperature egg yolk. Measure flour correctly by spooning into the cup and leveling off. Watch the oven closely as ovens vary. For extra flavor, try browning the butter before using.
Nutrition
- Serving Size: 1 cookie
- Calories: 180
- Sugar: 14
- Sodium: 120
- Fat: 11
- Saturated Fat: 6
- Carbohydrates: 22
- Fiber: 1
- Protein: 2
Keywords: small-batch chocolate chip cookies, easy cookie recipe, quick cookies, no chill cookies, small batch cookies


