I had this whole plan for Halloween baking. I was going to make something intricate, you know, the kind of thing that looks like it belongs in a bakery window. I bought three different types of piping tips and a special gel coloring kit. Then my five-year-old looked at the pile of equipment and asked if we could just make a cat. A black cat. And honestly? That was the moment my fancy plan fell apart.
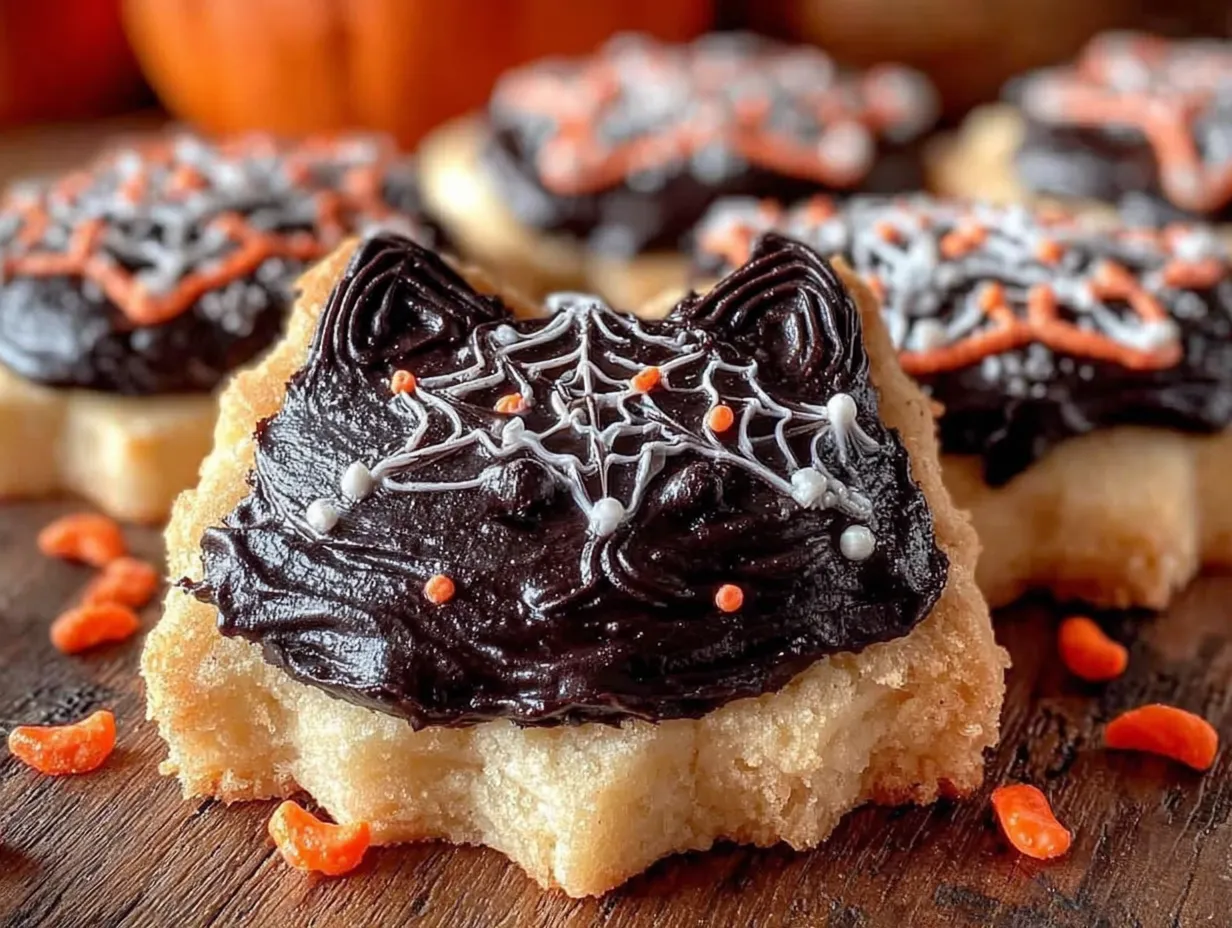
It took about ten minutes for me to realize that the most complicated cookies aren’t always the most fun. These Adorable Black Cat Halloween Sugar Cookies are the opposite of complicated. They’re simple, a little bit messy, and absolutely perfect for making with kids (or for when you want to feel like a kid yourself). The cookies themselves are a classic, buttery sugar cookie base that holds its shape beautifully. The magic happens when you add a few chocolate chips for eyes and a little smile—suddenly, you have a whole batch of these cute little guys staring back at you.
I’ve made a lot of sugar cookies over the years, and I’ve learned that the secret isn’t fancy equipment. It’s about a dough that doesn’t spread, a frosting that sets up nicely, and a design that’s forgiving enough for little hands. These black cat cookies check all those boxes. They’re the kind of treat that makes people smile before they even take a bite. And isn’t that what Halloween is really about?
Why You’ll Love This Recipe
Let me tell you why these cookies have become my go-to for Halloween parties and classroom treats. I’ve tested this recipe at least a dozen times to get it just right, and every single batch disappears within minutes.
- Super Simple Design : No piping skills required. If you can dip a cookie and place two chocolate chips, you can make these cats. They’re genuinely foolproof.
- Perfect Shape Retention : This sugar cookie dough doesn’t spread. Your cat heads will stay perfectly round, and those little ears will stay pointy. I learned this the hard way after a batch of melted-looking blobs last year.
- Kid-Friendly Fun : My kids have made these every year since they were toddlers. The decorating part is like an edible craft project, and there’s no wrong way to make a cat face.
- Make-Ahead Magic : The dough freezes beautifully, and the decorated cookies stay fresh for days. You can prep everything ahead of time and assemble them when you’re ready.
- Customizable Characters : Once you master the black cat, you can make white ghosts, orange pumpkins, or little monster faces using the same technique. It’s a whole Halloween village in cookie form.
What makes these different from every other sugar cookie recipe out there is the texture. They’re crisp on the edges but still soft in the center, with a buttery flavor that doesn’t get lost under the frosting. I use a touch of almond extract in the dough, which gives them that classic bakery taste. And the black cocoa frosting? It’s not just food coloring—it actually tastes like dark chocolate, so every bite is balanced and delicious.
These cookies are the kind that make you feel like a hero at a party. They’re cute enough to impress, simple enough to enjoy making, and delicious enough that people reach for seconds before they’ve finished their first.
What Ingredients You Will Need
This recipe uses simple, everyday ingredients to create something special. Most of these are probably already in your pantry, which is exactly how I like my baking projects to start.
For the Sugar Cookies
- 2 ¾ cups all-purpose flour (spooned and leveled—don’t scoop straight from the bag or your cookies will be tough)
- 1 teaspoon baking powder (make sure it’s fresh; expired baking powder is the #1 reason cookies don’t spread properly)
- ½ teaspoon salt (I use fine sea salt; it dissolves better in the dough)
- 1 cup unsalted butter, softened to room temperature (I always use Kerrygold for the best flavor, but any good-quality butter works)
- 1 cup granulated sugar (regular white sugar, nothing fancy)
- 1 large egg, room temperature (if you forget to take it out ahead of time, place it in a bowl of warm water for 5 minutes)
- 1 teaspoon vanilla extract (pure, not imitation—it makes a difference in the final flavor)
- ½ teaspoon almond extract (optional but recommended; this is the secret to that bakery-style taste)
For the Black Cocoa Frosting
- 3 cups powdered sugar, sifted (sifting prevents lumps, and nobody wants lumpy frosting on a cute cat face)
- ½ cup unsweetened cocoa powder (I use black cocoa powder for the deepest color, but regular dark cocoa works too)
- 6 tablespoons unsalted butter, softened
- 3-4 tablespoons milk (whole milk gives the creamiest texture, but any milk works)
- 1 teaspoon vanilla extract
- Pinch of salt (balances the sweetness)
For Decorating
- Mini chocolate chips (for the eyes—look for the tiny ones, not the regular size)
- Orange or yellow candy melts (for the eyes, if you want them to pop against the black frosting)
- Black licorice strings or black frosting pen (for whiskers, optional but adorable)
A note on the cocoa powder: black cocoa powder gives that gorgeous dark, dark color that makes these cats look truly spooky. You can find it at most baking supply stores or online. If you use regular cocoa powder, your cats will be more of a dark brown, which is still cute—just less dramatic.
Equipment Needed
You don’t need a lot of fancy tools for this recipe, which is one of the reasons I love it. Here’s what you’ll actually use:
- Electric mixer (stand mixer or hand mixer both work; I’ve made this dough with a hand mixer many times and it comes out perfectly)
- Large mixing bowls (one for dry ingredients, one for wet)
- Whisk (for combining the dry ingredients evenly)
- Rolling pin (I prefer a French-style tapered pin, but any rolling pin works)
- Parchment paper (essential for easy cleanup and preventing sticking)
- Cat-shaped cookie cutter (I use a 3-inch cat head cutter, but any size works—just adjust baking time slightly)
- Cooling racks (wire racks help the cookies cool evenly so the frosting doesn’t melt)
- Small offset spatula (for spreading the frosting smoothly)
- Baking sheets (light-colored metal sheets work best; dark sheets can cause over-browning)
If you don’t have a cat-shaped cookie cutter, don’t worry. You can use a round cutter and add little triangles of dough for ears, or you can freehand the shape with a knife. I’ve done both, and honestly, the freehand ones have a charming handmade look that people love.
Preparation Method
Let’s walk through this step by step. I’ve included all the little details I wish someone had told me the first time I made these.
Step 1: Make the Cookie Dough
In a medium bowl, whisk together the flour, baking powder, and salt. Set this aside. In a large bowl (or the bowl of your stand mixer), beat the softened butter and granulated sugar together on medium speed until light and fluffy, about 3 minutes. You want it to look pale and creamy—this is where the air gets incorporated, which gives your cookies a tender texture.
Add the egg, vanilla extract, and almond extract, and beat until combined. The mixture might look a little curdled at this point, but that’s normal. Don’t panic. Gradually add the dry ingredients to the wet ingredients, mixing on low speed until just combined. The dough will be soft but not sticky. If it feels too sticky to handle, add another tablespoon of flour.
Step 2: Chill the Dough
Divide the dough in half, flatten each half into a disk about 1-inch thick, and wrap them tightly in plastic wrap. Refrigerate for at least 2 hours, or up to 3 days. This step is non-negotiable. Chilled dough doesn’t spread when baked, and it’s much easier to roll out and cut into shapes. I’ve tried skipping this step, and the result was a batch of sad, shapeless blobs that looked nothing like cats.
Step 3: Roll and Cut
Preheat your oven to 350°F (175°C). Line two baking sheets with parchment paper. Lightly flour your work surface and rolling pin. Roll one disk of dough to about ¼-inch thickness. If the dough starts to stick, dust a little more flour underneath and on top. Cut out your cat shapes using the cookie cutter, and transfer them to the prepared baking sheets, spacing them about 2 inches apart.
Gather the scraps, gently press them together, re-roll, and cut more cookies. You can repeat this process a couple of times, but the dough gets tougher each time you re-roll it, so try to cut as many cookies as possible on the first pass.
Step 4: Bake the Cookies
Bake for 8-10 minutes, or until the edges are just barely golden. The centers should look set but not browned. Remove from the oven and let the cookies cool on the baking sheet for 5 minutes. This allows them to firm up so they don’t break when you move them. Then transfer them to a wire rack to cool completely. Don’t even think about frosting them until they’re completely cool—warm cookies will turn your frosting into a melty mess.
Step 5: Make the Frosting
In a medium bowl, beat the softened butter until smooth and creamy. Add the sifted powdered sugar and cocoa powder alternately with the milk, starting with the sugar mixture. Add the vanilla and salt, and beat on medium speed until the frosting is smooth and spreadable. If it’s too thick, add another tablespoon of milk. If it’s too thin, add more powdered sugar. The frosting should be thick enough to hold its shape but soft enough to spread easily.
Step 6: Decorate the Cats
Using the offset spatula, spread a thin, even layer of black frosting over each cooled cookie. Don’t pile it on too thick—you want to see the cat shape underneath. While the frosting is still wet, press two mini chocolate chips into each cookie for eyes, pointy side up. Add a tiny upside-down triangle of frosting for the nose, or just use a small dot of the frosting to place a tiny orange candy melt for the nose.
For the whiskers, you can pipe them on with a black frosting pen, or use short pieces of black licorice string. I usually let the frosting set for about 10 minutes first, then add the whiskers so they stay in place.
Cooking Tips & Techniques
I’ve made plenty of mistakes with sugar cookies over the years, so you don’t have to. Here are the things I wish I’d known from the start.
Don’t overwork the dough. The more you handle it, the tougher the cookies get. Mix just until the flour disappears, and stop. I used to keep mixing until the dough was perfectly smooth, and my cookies came out dense and hard. Now I stop the mixer as soon as the dough comes together, and the texture is so much better.
Chill between batches. If you’re making multiple batches, pop the baking sheets in the fridge for 10 minutes before baking. This resets the butter and prevents spreading. I learned this trick from a bakery owner, and it makes a huge difference, especially if your kitchen is warm.
Use a light touch with the frosting. You want to be able to taste the cookie, not just the frosting. A thin layer of black cocoa frosting is all you need. Too much frosting overwhelms the delicate buttery flavor of the cookie.
Work in an assembly line. Frost all the cookies first, then go back and add the eyes and noses. This way, the frosting is at the same consistency for all of them, and you can work quickly while it’s still wet enough to hold the decorations.
Let the cookies speak for themselves. Don’t over-decorate. The beauty of these cats is their simplicity. Two eyes, a little nose, maybe some whiskers—that’s all you need. I once added bows and hats to a batch, and honestly, they lost their charm. Sometimes less really is more.
Variations & Adaptations
One of the best things about this recipe is how easy it is to adapt. Here are some of my favorite variations:
Gluten-Free Version: Substitute the all-purpose flour with a 1:1 gluten-free baking flour blend. I’ve used Bob’s Red Mill and King Arthur brands with great success. The texture is slightly more delicate, so handle the dough gently and chill it well.
Vegan Option: Use vegan butter (I like Miyoko’s or Earth Balance) and a flax egg (1 tablespoon ground flaxseed mixed with 3 tablespoons water, let sit for 5 minutes). The cookies won’t be quite as tender, but they’re still delicious and the kids won’t know the difference.
Spooky Cat Variations: Turn your black cats into Halloween characters. Add a tiny white frosting dot to the eyes for a glow effect. Pipe a little orange pumpkin next to the cat. Or use white candy melts to make ghost cats—just skip the black cocoa and use white frosting with black eyes.
Flavor Twists: Add ½ teaspoon of peppermint extract for a minty Halloween treat. Or swap the almond extract for orange zest and a teaspoon of orange juice for a citrusy black cat. I made a batch last year with a pinch of cayenne pepper in the frosting, and they were surprisingly good—spicy and sweet.
Different Cookie Cutter Shapes: Don’t limit yourself to cats. This recipe works beautifully with any shape. Use a bat, pumpkin, or ghost cutter for a whole Halloween collection. The dough is versatile enough for any design.
If you’re looking for more easy Halloween treats, you might also enjoy this creamy witch’s brew pumpkin spice cold brew float for a spooky drink to go with your cookies.
Serving & Storage Suggestions
These cookies are best served at room temperature, which is when the texture is perfect—crisp edges with a soft, tender center. Arrange them on a platter with a few orange and purple napkins for a festive look. They’re perfect for Halloween parties, classroom treats, or just a fun afternoon baking project with the kids.
For storage, place the decorated cookies in an airtight container at room temperature. They’ll stay fresh for up to 5 days. If you stack them, place a sheet of parchment paper between the layers to prevent the frosting from smudging. I’ve found that the cookies actually taste better on day two—the flavors meld together and the texture softens slightly.
To freeze the baked, undecorated cookies, place them in a single layer on a baking sheet and freeze until solid, then transfer to a freezer-safe bag. They’ll keep for up to 3 months. When you’re ready to serve, thaw them at room temperature, then frost and decorate. This is my favorite method for holiday prep—I bake the cookies weeks in advance and decorate them the day before the party.
If you’re serving these at a party, consider pairing them with a cozy pumpkin cinnamon roll casserole with maple cream cheese drizzle for a full Halloween dessert spread. The combination of buttery cookies and warm, spiced casserole is absolutely irresistible.
Nutritional Information & Benefits
Let’s be honest—these are a treat, not a health food. But here’s what you’re looking at per cookie (based on a 3-inch cat shape with frosting):
- Calories: Approximately 180-200
- Fat: 9g
- Carbohydrates: 25g
- Sugar: 16g
- Protein: 2g
If you’re looking for a lighter option, you can reduce the sugar in the dough by a quarter cup without affecting the texture too much. Or skip the frosting altogether and just dust the cookies with powdered sugar for a ghostly effect.
The almond extract adds a lovely flavor, but if you have a nut allergy in the family, just leave it out or substitute with more vanilla. The cookies will still taste great.
For a healthier Halloween snack option, you might want to try these easy no-bake peanut butter oat energy balls for a treat that’s a little more balanced.
Conclusion
These Adorable Black Cat Halloween Sugar Cookies have become a beloved tradition in our house. They’re simple enough for little hands to help with, cute enough to impress at any party, and delicious enough that nobody can eat just one. Every time I make them, I’m reminded that the best recipes aren’t the most complicated ones—they’re the ones that bring people together and make them smile.
I hope you’ll give these a try and make them your own. Maybe you’ll add green eyes instead of chocolate chips, or pipe on little spider webs. The beauty of this recipe is that there’s no wrong way to do it. So grab your kids, your friends, or just yourself, and make some magic in the kitchen.
If you make these cookies, I’d love to hear about it! Leave a comment below and tell me how your cats turned out. And if you come up with a fun variation, please share it—I’m always looking for new ideas. Happy Halloween, and happy baking!
Frequently Asked Questions
Can I use a different type of frosting?
Absolutely. Royal icing works beautifully for a smoother, more polished look. You can also use store-bought black frosting in a pinch, though it won’t have the same rich cocoa flavor. I’ve even used melted black candy melts for a shiny, hard shell finish.
Why did my cookies spread in the oven?
This usually happens when the dough isn’t chilled enough. Make sure you refrigerate the dough for at least 2 hours before rolling and cutting. If your kitchen is warm, pop the cut cookies on the baking sheet into the fridge for 10 minutes before baking. Also, check that your butter wasn’t too soft when you started.
How do I get the frosting so black?
The secret is black cocoa powder. It’s darker than regular cocoa and gives that deep, dramatic black color. If you can’t find it, use regular dark cocoa and add a tiny drop of black food coloring. Start with just a little—you can always add more, but you can’t take it out.
Can I make these cookies ahead of time?
Yes, and I actually recommend it. The baked, undecorated cookies can be stored in an airtight container for up to a week, or frozen for up to 3 months. The dough itself can be refrigerated for up to 3 days or frozen for up to 2 months. This makes them perfect for planning ahead for Halloween parties.
My cookies came out too hard. What went wrong?
Overbaking is the most common culprit. Sugar cookies should be baked just until the edges are set and barely golden. They continue to firm up as they cool on the baking sheet. Also, overworking the dough can make cookies tough. Mix just until the flour is incorporated, and handle the dough as little as possible when rolling and cutting.
For more delicious recipes that are perfect for fall, check out this cozy fall brown sugar cinnamon French toast casserole that’s perfect for Halloween morning breakfast before the festivities begin.
Pin This Recipe!
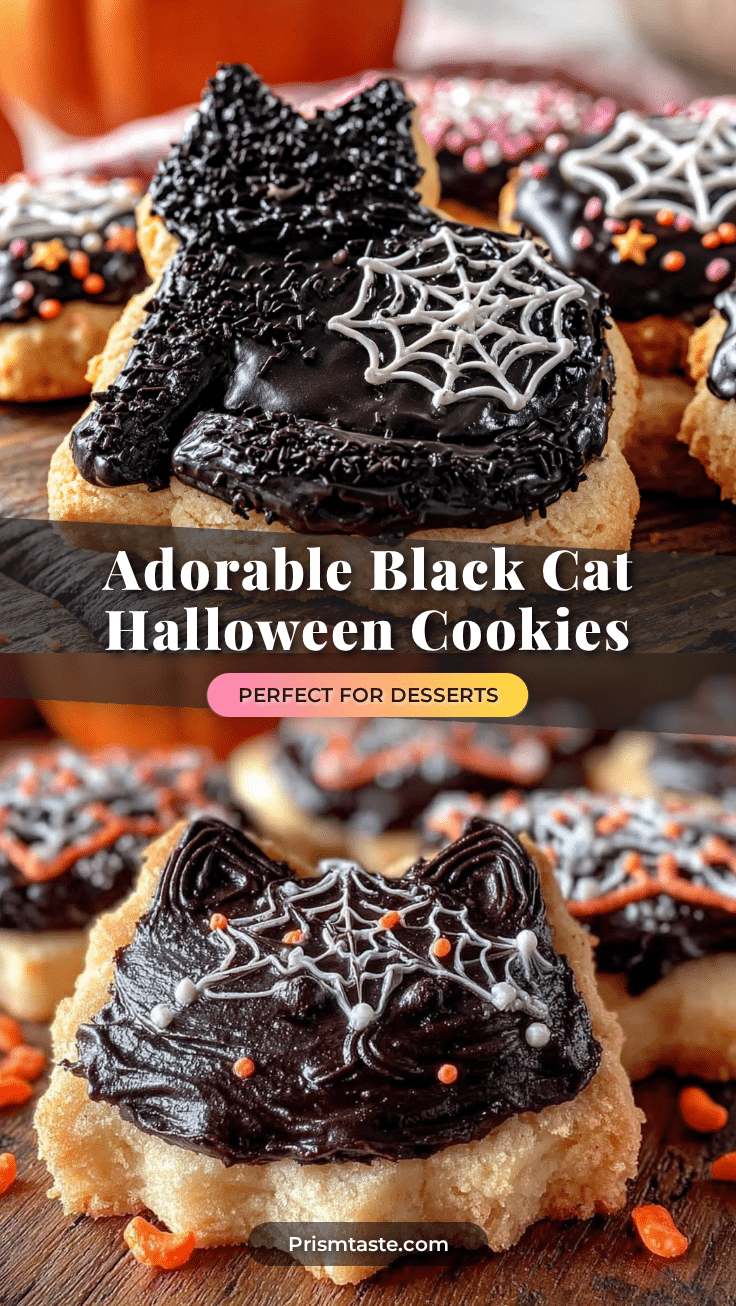
Adorable Black Cat Halloween Sugar Cookies – Easy Spooky Treats
These Adorable Black Cat Halloween Sugar Cookies are simple, a little bit messy, and absolutely perfect for making with kids. They feature a classic buttery sugar cookie base with a rich black cocoa frosting and cute chocolate chip eyes.
- Prep Time: 30 minutes
- Cook Time: 10 minutes
- Total Time: 2 hours 40 minutes (includes chilling time)
- Yield: 24 servings 1x
- Category: Dessert
- Cuisine: American
Ingredients
- 2 ¾ cups all-purpose flour (spooned and leveled)
- 1 teaspoon baking powder
- ½ teaspoon fine sea salt
- 1 cup unsalted butter, softened to room temperature
- 1 cup granulated sugar
- 1 large egg, room temperature
- 1 teaspoon pure vanilla extract
- ½ teaspoon almond extract (optional)
- 3 cups powdered sugar, sifted
- ½ cup unsweetened black cocoa powder (or regular dark cocoa)
- 6 tablespoons unsalted butter, softened
- 3–4 tablespoons milk (whole milk preferred)
- 1 teaspoon vanilla extract
- Pinch of salt
- Mini chocolate chips (for eyes)
- Orange or yellow candy melts (optional, for eyes)
- Black licorice strings or black frosting pen (optional, for whiskers)
Instructions
- In a medium bowl, whisk together flour, baking powder, and salt. Set aside.
- In a large bowl, beat softened butter and granulated sugar on medium speed until light and fluffy, about 3 minutes.
- Add egg, vanilla extract, and almond extract; beat until combined. The mixture may look curdled.
- Gradually add dry ingredients to wet ingredients, mixing on low speed until just combined. Dough should be soft but not sticky.
- Divide dough in half, flatten into 1-inch thick disks, wrap in plastic wrap, and refrigerate for at least 2 hours (up to 3 days).
- Preheat oven to 350°F (175°C). Line baking sheets with parchment paper.
- Lightly flour work surface and rolling pin. Roll one disk of dough to ¼-inch thickness.
- Cut out cat shapes using a cat-shaped cookie cutter. Transfer to prepared baking sheets, spacing 2 inches apart.
- Gather scraps, re-roll, and cut more cookies.
- Bake for 8-10 minutes, until edges are just barely golden. Cool on baking sheet for 5 minutes, then transfer to wire rack to cool completely.
- For frosting: Beat softened butter until smooth. Add sifted powdered sugar and cocoa powder alternately with milk. Add vanilla and salt; beat until smooth and spreadable.
- Spread a thin layer of black frosting over each cooled cookie.
- While frosting is wet, press two mini chocolate chips into each cookie for eyes (pointy side up). Add a tiny frosting dot or orange candy melt for the nose.
- Optional: Add whiskers using black frosting pen or short pieces of black licorice string after frosting sets for 10 minutes.
Notes
Chilling the dough is essential to prevent spreading. Black cocoa powder gives the deepest color; regular dark cocoa works but yields a dark brown. For best texture, don’t overwork the dough. Cookies can be stored in an airtight container at room temperature for up to 5 days. Baked undecorated cookies can be frozen for up to 3 months.
Nutrition
- Serving Size: 1 cookie
- Calories: 190
- Sugar: 16
- Sodium: 80
- Fat: 9
- Saturated Fat: 5
- Carbohydrates: 25
- Fiber: 1
- Protein: 2
Keywords: Halloween cookies, black cat cookies, sugar cookies, easy Halloween treats, kid-friendly baking, spooky cookies


