My husband took a bite of the first test batch, stopped chewing, and just stared at the bagel in his hand for a solid three seconds. “Wait,” he said, mouth still half-full, “this is a bagel?” I knew exactly what he meant. It wasn’t just the warm pumpkin spice hitting his senses or the way the cream cheese melted slightly into the crumb. It was the fact that it actually tasted like a real, chewy, satisfying bagel—not a dense, gummy pumpkin-flavored bread pretending to be one. That moment of quiet disbelief was better than any recipe review I could have written myself.
I had been chasing this specific texture for weeks. You see, most homemade pumpkin bagels (and I’ve tried a lot) end up tasting more like a soft roll that got lost in a pumpkin patch. They lack that signature chew, that satisfying pull that makes a bagel a bagel. The problem is always the moisture—pumpkin puree adds so much liquid that the dough gets heavy and the gluten structure weakens. I wanted a bagel that tasted like fall but felt like a classic New York-style breakfast. Something that could hold up to a generous schmear of sweet, tangy maple cream cheese without falling apart. Honestly, I almost gave up after a particularly flat, sad batch that looked more like hockey pucks than breakfast.
But then, I roasted the pumpkin puree first. That one small tweak changed everything. It concentrated the flavor and removed just enough moisture to let the dough develop that perfect, bouncy texture I was craving. The result is these cozy pumpkin bagels with maple cream cheese. They are golden, slightly sweet, and have that irresistible chew that makes you reach for another half before you’ve finished the first. This recipe is my personal victory over the soggy pumpkin bagel problem, and I’m pretty sure you’re going to love it too.
Why You’ll Love This Recipe
These aren’t just another pumpkin recipe to pin and forget. I’ve tested this dough more times than I care to admit, and here is why this version actually works.
- Real Bagel Texture : This dough delivers that classic, chewy bagel bite you expect from a bakery. The trick of roasting the pumpkin puree removes excess water, allowing the gluten to develop properly without turning your dough into a sticky mess.
- Simple, Whole-Food Ingredients : No weird additives or specialty flours here. You probably have most of these pantry staples already, and the ingredient list is refreshingly short and recognizable.
- Perfect for a Cozy Fall Morning : These bagels are made for lazy weekends, crisp October mornings, or even a special Halloween breakfast. They bring that warm, spiced comfort to your table without requiring you to stand over a stove for hours.
- Crowd-Pleasing Flavor : The pumpkin and warm spices are subtle enough to please everyone—including those who claim they “don’t like pumpkin-flavored things.” The maple cream cheese is the real showstopper, adding a creamy, sweet-savory finish that makes these bagels unforgettable.
- Make-Ahead Friendly : The dough can be prepped the night before, and the baked bagels freeze beautifully. You can have a cozy, bakery-style breakfast ready in minutes, even on a busy weekday morning.
Let’s be honest—there are a million pumpkin bagel recipes out there. What makes this one different? It’s the texture. It’s the maple cream cheese that isn’t just sweet but has a subtle tang that perfectly balances the warm spices. It’s the fact that these bagels actually toast up beautifully, getting crisp on the outside while staying soft and chewy inside. This isn’t just another version; it’s the one I will make every single fall from now on.
What Ingredients You Will Need
This recipe relies on a handful of simple, high-quality ingredients to create that perfect bagel experience. The magic really happens in the balance of moisture and spice, so let’s talk about what you need and why.
- Pumpkin Puree (1 cup, roasted) : This is non-negotiable for the best texture. Use 100% pure pumpkin puree, not pumpkin pie filling. I prefer Libby’s for its consistent thickness. Spread the puree on a baking sheet and roast at 400°F for about 15-20 minutes, until it darkens slightly and looks thicker. This removes excess moisture, which is the secret to a chewy, not gummy, bagel.
- Bread Flour (3 ½ cups, plus more for dusting) : Bread flour has a higher protein content than all-purpose flour, which is essential for creating that signature bagel chew. You can use all-purpose in a pinch, but the texture will be softer and less authentic. King Arthur Flour is my go-to for consistent results.
- Warm Water (1 cup, around 110°F) : The water temperature is important for activating the yeast. Too hot and you’ll kill it; too cold and it won’t bloom properly. Think warm bath water, not hot tea.
- Active Dry Yeast (2 ¼ teaspoons, or one standard packet) : This gives the bagels their rise and that airy interior. I always use Red Star or Fleischmann’s for reliable results. Make sure your yeast is fresh—check the expiration date!
- Brown Sugar (¼ cup, packed) : A touch of brown sugar adds a subtle molasses flavor that pairs beautifully with the pumpkin and spices. It also helps feed the yeast and contributes to browning during baking.
- Pumpkin Pie Spice (1 ½ teaspoons) : You can use a store-bought blend or make your own with cinnamon, nutmeg, ginger, and cloves. This is where the cozy fall flavor comes from.
- Cinnamon (1 teaspoon) : I like to add a little extra cinnamon on top of the pumpkin pie spice for warmth. It just makes the kitchen smell incredible.
- Salt (1 ½ teaspoons) : Don’t skip this! Salt controls yeast activity and strengthens the gluten structure. It also enhances all the other flavors so the bagels don’t taste flat.
- Unsalted Butter (2 tablespoons, melted, for brushing) : Brushing the baked bagels with butter gives them a beautiful, soft sheen and adds a touch of richness.
For the Maple Cream Cheese:
- Cream Cheese (8 ounces, softened) : Use full-fat block cream cheese for the creamiest, richest spread. Philadelphia is my preferred brand. Let it sit at room temperature for at least 30 minutes before mixing.
- Pure Maple Syrup (3 tablespoons) : Use real maple syrup, not pancake syrup. Grade A Dark Amber has a stronger maple flavor that really stands up to the pumpkin spices. Trust me on this one—the flavor difference is huge.
- Powdered Sugar (1 tablespoon, optional) : This adds a touch of sweetness and helps stabilize the cream cheese so it’s spreadable but not runny. You can skip it if you prefer a less sweet spread.
- Pinch of Cinnamon : Just a tiny pinch to tie the spread back to the bagel flavors.
Equipment Needed
You don’t need a professional bakery setup to make these bagels, but a few key tools will make the process much smoother. Here is what you’ll need:
- Stand Mixer with Dough Hook : While you can knead this dough by hand (it’s a great arm workout!), a stand mixer makes the job significantly easier. The dough is quite stiff and requires about 8-10 minutes of kneading. A KitchenAid or similar model works perfectly.
- Large Baking Sheet : You’ll need a rimmed baking sheet for the water bath step and for baking the bagels. Line it with parchment paper for easy cleanup.
- Large Pot for Water Bath : A wide, deep pot is essential for boiling the bagels. You need enough room for the bagels to float without crowding. A Dutch oven or stockpot works great.
- Slotted Spoon or Spider Strainer : This is crucial for safely transferring the boiled bagels from the hot water to the baking sheet. A spider strainer is my favorite tool for this job.
- Kitchen Scale (Recommended) : For perfectly uniform bagels, weighing your dough is the most accurate method. Aim for about 100-110 grams per bagel. If you don’t have a scale, you can eyeball it, but the sizes will vary slightly.
- Plastic Wrap or a Damp Kitchen Towel : You’ll need this to cover the dough while it rises to prevent a skin from forming on the surface.
If you don’t have a stand mixer, don’t worry. You can absolutely knead this dough by hand on a lightly floured surface. It will take about 12-15 minutes of active kneading. It’s a great way to work out any frustration, and honestly, it connects you to the process in a satisfying way. Just be prepared for a slightly longer kneading time.
Preparation Method
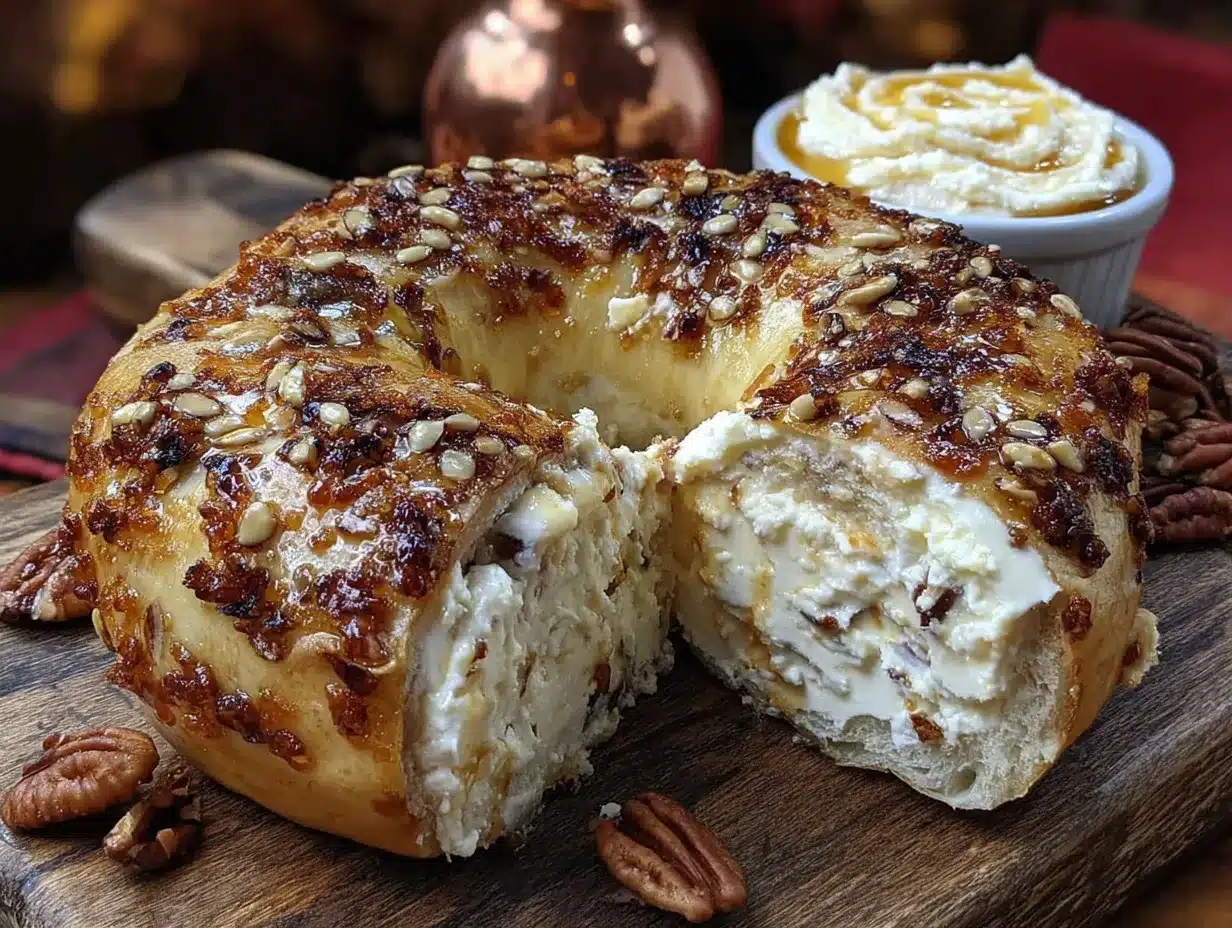
Making bagels from scratch is a two-day process in spirit, but the active work is surprisingly quick. Here is how to bring these cozy pumpkin bagels with maple cream cheese to life.
- Roast the Pumpkin Puree : Preheat your oven to 400°F. Spread the pumpkin puree on a parchment-lined baking sheet in a thin, even layer. Roast for 15-20 minutes, stirring halfway through, until the puree has darkened in color and looks noticeably thicker. Let it cool completely before using. This step removes about ¼ cup of water and is the single most important thing you can do for the texture.
- Bloom the Yeast : In the bowl of your stand mixer, combine the warm water (110°F) and 1 tablespoon of the brown sugar. Sprinkle the active dry yeast over the top and give it a gentle stir. Let it sit for 5-10 minutes until it becomes frothy and bubbly. If it doesn’t foam, your yeast is dead—start over with fresh yeast.
- Mix the Dough : Add the cooled, roasted pumpkin puree, the remaining brown sugar, pumpkin pie spice, cinnamon, and salt to the yeast mixture. Add 3 cups of the bread flour. Using the dough hook attachment, mix on low speed until the flour is mostly incorporated and a shaggy dough forms.
- Knead the Dough : With the mixer running on medium-low speed, gradually add the remaining ½ cup of flour, 1 tablespoon at a time. You may not need all of it. The dough should pull away from the sides of the bowl and feel smooth, firm, and slightly tacky—not sticky. Knead for 8-10 minutes. If kneading by hand, turn the dough out onto a lightly floured surface and knead for 12-15 minutes.
- First Rise : Shape the dough into a smooth ball. Place it in a lightly oiled bowl, turning to coat. Cover the bowl tightly with plastic wrap or a damp kitchen towel. Let it rise in a warm, draft-free place for 1 to 1 ½ hours, or until it has doubled in size. An oven with the light on is a perfect spot.
- Shape the Bagels : Punch down the risen dough to release the air. Turn it out onto a clean, unfloured surface (or very lightly floured). Divide the dough into 8 equal pieces. A kitchen scale is your best friend here. Roll each piece into a tight ball. To shape the bagel, poke your thumb through the center of the ball and gently stretch the hole to about 1 ½ inches in diameter. The hole will shrink during the next rise and boiling, so make it larger than you think it should be.
- Second Rise (Cold Proof) : Place the shaped bagels on a parchment-lined baking sheet, spacing them about 2 inches apart. Cover them loosely with plastic wrap and refrigerate overnight, or for at least 8 hours. This cold proof develops flavor and creates that shiny, crackly crust we love. If you’re in a hurry, you can let them rise at room temperature for 30 minutes, but the overnight method is superior.
- Boil the Bagels : The next morning, preheat your oven to 425°F. Bring a large pot of water to a rolling boil. Add 1 tablespoon of honey or barley malt syrup to the water—this helps create a shiny, golden crust. Carefully drop 2-3 bagels into the boiling water. Boil for 45 seconds on the first side, then flip and boil for another 30 seconds on the second side. Use your slotted spoon to transfer them back to the parchment-lined baking sheet. The bagels will look slightly wrinkled—that’s normal and good.
- Bake the Bagels : Immediately after boiling, place the baking sheet in the preheated oven. Bake for 20-25 minutes, until the bagels are deep golden brown and sound hollow when tapped on the bottom. Halfway through baking, rotate the pan for even browning.
- Finish with Butter : As soon as the bagels come out of the oven, brush them generously with the melted butter. This softens the crust slightly and adds a beautiful sheen. Let them cool on a wire rack for at least 15 minutes before slicing.
- Make the Maple Cream Cheese : While the bagels cool, combine the softened cream cheese, maple syrup, powdered sugar (if using), and a pinch of cinnamon in a small bowl. Beat with a hand mixer or a wooden spoon until smooth and creamy. Taste and adjust the sweetness or maple flavor to your liking.
Cooking Tips & Techniques
I’ve made every mistake you can imagine with these bagels, so you don’t have to. Here are the lessons I learned the hard way.
Don’t skip roasting the pumpkin. This is the biggest game-changer. The first time I made these, I used straight-from-the-can pumpkin puree. The dough was so sticky I had to add almost a full cup of extra flour, and the resulting bagels were dense and heavy. Roasting the puree concentrates the flavor and removes that excess moisture, giving you a dough that is a dream to work with and bagels with a light, chewy crumb.
Trust the cold proof. I know it’s tempting to skip the overnight refrigeration and just let the bagels rise at room temperature. But that overnight rest in the fridge does two critical things. First, it develops a deeper, more complex flavor as the yeast slowly ferments. Second, it firms up the dough, making the bagels much easier to handle during the boiling step. Bagels that haven’t been chilled tend to deflate or lose their shape in the boiling water.
Boil with confidence. The boiling step might seem intimidating, but it’s actually quite simple. The bagels will sink at first and then float to the surface. Don’t overcrowd the pot—give them room to move. A shorter boil (45 seconds per side) gives you a thinner, chewier crust, while a longer boil (up to 2 minutes per side) creates a thicker, more substantial crust. I prefer the shorter boil for these pumpkin bagels to keep them tender.
Watch your oven temperature. Every oven runs a little differently. Start checking your bagels at the 18-minute mark. You want them deeply golden brown, almost mahogany in spots. If they’re browning too quickly on the bottom, move the baking sheet to a higher rack. If they’re pale after 25 minutes, give them another 2-3 minutes.
One of my biggest failures was rushing the shaping step. I didn’t stretch the holes wide enough, and after the second rise and boiling, the holes completely closed up. I ended up with pumpkin-shaped dinner rolls instead of bagels. Make that hole generous—about 1 ½ inches—and it will shrink to a perfect, bagel-sized opening.
Variations & Adaptations
This base recipe is incredibly versatile. Here are a few ways I’ve adapted it depending on my mood or what I have on hand.
- Everything Bagel Pumpkin Bagels : After brushing the boiled bagels with an egg wash (1 egg beaten with 1 tablespoon of water), sprinkle them generously with everything bagel seasoning before baking. The savory, garlicky crunch against the sweet pumpkin base is surprisingly addictive. My husband actually prefers this version over the plain one.
- Gluten-Free Adaptation : I’ve had good success using a high-quality 1:1 gluten-free baking flour blend, like King Arthur Measure for Measure. The dough will be much stickier and more like a thick batter. You’ll need to use a generous amount of rice flour on your hands to shape them, and the texture will be softer and less chewy than the wheat version. It’s still delicious, just different.
- Vegan Maple Cream Cheese : For a dairy-free version, use a high-quality vegan cream cheese block (not the spreadable tub kind). Miyoko’s is my favorite. The maple syrup and pinch of cinnamon work the same magic. The texture will be slightly less firm, but the flavor is still fantastic.
- Chocolate Chip Pumpkin Bagels : During the shaping step, gently knead ½ cup of mini chocolate chips into the dough. The combination of warm pumpkin spice and melted chocolate is a cozy dream. I do this when I’m making them for a special brunch or holiday morning.
- Savory Pumpkin Bagels : Omit the pumpkin pie spice and cinnamon. Add 1 teaspoon of garlic powder, 1 teaspoon of dried rosemary, and ½ teaspoon of black pepper to the dough. These are incredible toasted and topped with a fried egg and some sharp cheddar cheese.
Serving & Storage Suggestions
These cozy pumpkin bagels with maple cream cheese are best served warm, but they’re honestly fantastic at any temperature. Here is how I like to enjoy them.
Serving : Slice the bagel in half and toast it until golden and crisp around the edges. This brings back the crust’s snap and warms the interior. Spread a generous layer of the maple cream cheese on both halves. For an extra-special touch, top with a sprinkle of flaky sea salt or a few toasted pecans. These bagels pair beautifully with a hot cup of coffee, a creamy pumpkin spice cold brew float for a decadent fall treat, or even a simple glass of cold milk. They also make a fantastic base for a breakfast sandwich—try them with a fried egg, crispy bacon, and a slice of cheddar.
Storage : Store the cooled, un-sliced bagels in an airtight container or a zip-top bag at room temperature for up to 3 days. Do not refrigerate them—the fridge actually makes bagels go stale faster. The maple cream cheese can be stored in a sealed container in the refrigerator for up to 5 days. Let it sit at room temperature for 10 minutes before spreading to soften.
Freezing : These bagels freeze like a dream. Slice them in half before freezing for easy toasting later. Place the sliced bagels in a single layer on a baking sheet and freeze until solid, about 1 hour. Transfer the frozen bagel halves to a freezer-safe bag. To reheat, pop a frozen half directly into the toaster—no need to thaw. They’ll be perfectly crisp and warm in just a few minutes. I always keep a stash in my freezer for busy mornings. The flavor actually seems to deepen after a few days in the freezer, which is a happy accident I discovered when I made too many.
Nutritional Information & Benefits
While these bagels are a treat, they do offer some nutritional perks thanks to the star ingredient. Here is a rough estimate per bagel (without cream cheese, based on the recipe as written):
- Calories : Approximately 280-320
- Protein : 8-10 grams
- Carbohydrates : 55-60 grams
- Fat : 3-5 grams
- Fiber : 3-4 grams
- Sugar : 12-15 grams
Pumpkin is a nutritional powerhouse. It is packed with vitamin A (in the form of beta-carotene), which supports eye health and immune function. It’s also a good source of fiber, which aids digestion and helps you feel full and satisfied. The pumpkin also adds moisture and natural sweetness, allowing us to use less added sugar than a traditional bagel recipe.
The maple cream cheese adds about 80-100 calories and 3-4 grams of protein per generous tablespoon serving. Real maple syrup contains antioxidants and minerals like zinc and manganese. If you’re looking for a lower-calorie option, you can use a reduced-fat cream cheese or a dairy-free alternative. For a lower-carb version, you can try a keto-friendly bagel recipe, but this version is best enjoyed as part of a balanced, whole-foods diet. It is a cozy pumpkin bagel with maple cream cheese—it’s meant to be a joyful, satisfying breakfast, not a health food. And that is perfectly okay.
Conclusion
These bagels are more than just a recipe—they are a little piece of fall that you can hold in your hand. The first time I pulled a perfectly golden, chewy pumpkin bagel out of the oven, I felt a ridiculous sense of accomplishment. It was proof that with a little patience and one small trick (roasting that pumpkin!), you can make something at home that rivals anything from a bakery. The smell of pumpkin, cinnamon, and maple filling my kitchen on a crisp October morning is now one of my favorite seasonal rituals.
I really hope you give these a try. Don’t be intimidated by the boiling step or the overnight proof—they are both simpler than they sound, and the result is absolutely worth it. Make them for a lazy Sunday brunch, surprise your family on a school morning, or just treat yourself to something special. Feel free to play around with the variations or come up with your own twist. And if you do make them, I would love to hear how they turned out. Drop a comment below, share a photo, or tag me in your post. Happy baking, and here is to a cozy, delicious fall season!
Frequently Asked Questions
Can I make these bagels vegan?
Yes, you can! Use a vegan cream cheese block for the spread and substitute the butter with a vegan butter or a neutral oil for brushing. The bagel dough itself is naturally dairy-free, as it only uses water, flour, yeast, pumpkin, and spices. Just make sure your brown sugar is vegan-friendly (some are processed with bone char, but most organic brands are not).
Why did my bagels turn out flat?
Flat bagels usually happen for one of two reasons. Either the dough didn’t develop enough gluten during kneading, or the shaped bagels weren’t chilled long enough before boiling. Make sure you knead the dough for the full 8-10 minutes until it is smooth and elastic. Also, don’t skip the overnight cold proof—it firms up the dough so the bagels hold their shape in the boiling water.
Can I use all-purpose flour instead of bread flour?
You can, but the texture will be noticeably different. Bread flour has a higher protein content, which creates more gluten and gives bagels their signature chew. All-purpose flour will result in a softer, more bread-like bagel. If you only have all-purpose, add an extra tablespoon of vital wheat gluten to help boost the protein content and improve the texture.
How do I know when the bagels are done baking?
Perfectly baked bagels should be deep golden brown all over. The best test is to tap the bottom of a bagel—it should sound hollow, like you’re knocking on a wooden door. If it sounds dull or thud-like, they need a few more minutes in the oven. The internal temperature should be around 200°F if you want to use a thermometer.
Can I skip the overnight cold proof?
Yes, but the results won’t be as good. If you’re short on time, let the shaped bagels rise at room temperature for 30-45 minutes until they look slightly puffy, then boil and bake them immediately. The bagels will be less flavorful and the crust won’t be as shiny or crisp, but they will still be tasty. For the best results, though, the overnight proof is worth the wait.
Pin This Recipe!
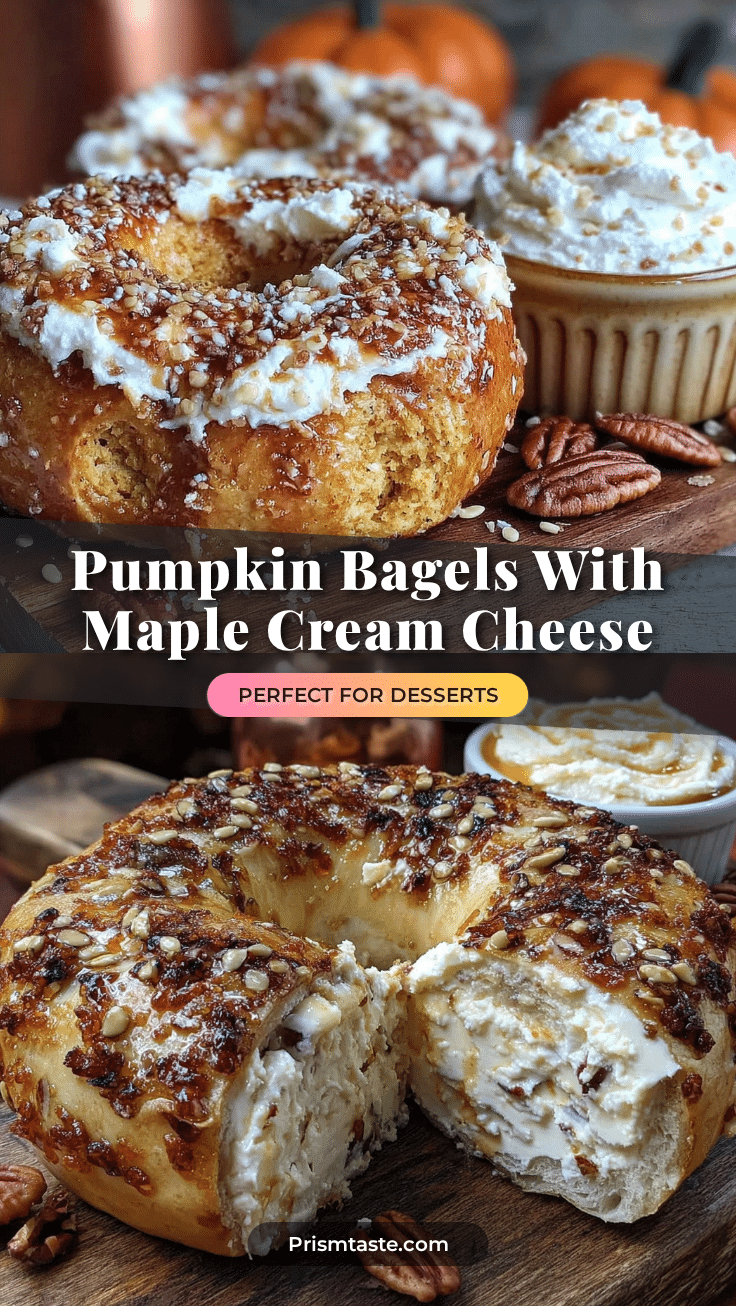
Cozy Pumpkin Bagels with Maple Cream Cheese
These golden, slightly sweet pumpkin bagels have that irresistible chewy texture you expect from a bakery, thanks to a simple trick of roasting the pumpkin puree first. Paired with a creamy, tangy maple cream cheese, they are the perfect cozy fall breakfast.
- Prep Time: 30 minutes
- Cook Time: 25 minutes
- Total Time: 1 hour 55 minutes (plus overnight cold proof)
- Yield: 8 servings 1x
- Category: Breakfast
- Cuisine: American
Ingredients
- 1 cup pumpkin puree, roasted
- 3 ½ cups bread flour, plus more for dusting
- 1 cup warm water (110°F)
- 2 ¼ teaspoons active dry yeast (1 packet)
- ¼ cup brown sugar, packed
- 1 ½ teaspoons pumpkin pie spice
- 1 teaspoon cinnamon
- 1 ½ teaspoons salt
- 2 tablespoons unsalted butter, melted (for brushing)
- 8 ounces cream cheese, softened
- 3 tablespoons pure maple syrup
- 1 tablespoon powdered sugar (optional)
- Pinch of cinnamon
Instructions
- Roast the pumpkin puree: Preheat oven to 400°F. Spread pumpkin puree on a parchment-lined baking sheet in a thin layer. Roast for 15-20 minutes, stirring halfway, until darkened and thickened. Let cool completely.
- Bloom the yeast: In the bowl of a stand mixer, combine warm water and 1 tablespoon brown sugar. Sprinkle yeast on top, stir gently, and let sit for 5-10 minutes until frothy.
- Mix the dough: Add cooled pumpkin puree, remaining brown sugar, pumpkin pie spice, cinnamon, and salt to the yeast mixture. Add 3 cups bread flour. Mix on low with dough hook until a shaggy dough forms.
- Knead the dough: With mixer on medium-low, gradually add remaining ½ cup flour, 1 tablespoon at a time, until dough pulls away from sides and is smooth, firm, and slightly tacky. Knead 8-10 minutes (12-15 minutes by hand).
- First rise: Shape dough into a ball, place in a lightly oiled bowl, turn to coat, cover with plastic wrap, and let rise in a warm place for 1 to 1 ½ hours until doubled.
- Shape the bagels: Punch down dough, turn onto a clean surface, and divide into 8 equal pieces (about 100-110g each). Roll each into a tight ball, then poke a thumb through the center and stretch to a 1 ½-inch hole.
- Second rise (cold proof): Place shaped bagels on a parchment-lined baking sheet, cover loosely with plastic wrap, and refrigerate overnight (at least 8 hours).
- Boil the bagels: Preheat oven to 425°F. Bring a large pot of water to a boil and add 1 tablespoon honey or barley malt syrup. Boil 2-3 bagels at a time for 45 seconds per side. Transfer back to baking sheet with a slotted spoon.
- Bake the bagels: Bake for 20-25 minutes until deep golden brown and hollow-sounding when tapped. Rotate pan halfway through.
- Finish with butter: Brush hot bagels with melted butter. Cool on a wire rack for at least 15 minutes before slicing.
- Make the maple cream cheese: In a small bowl, beat softened cream cheese, maple syrup, powdered sugar (if using), and a pinch of cinnamon until smooth and creamy.
Notes
Roasting the pumpkin puree is essential for removing excess moisture and achieving a chewy texture. The overnight cold proof develops flavor and makes the bagels easier to handle. For a thinner crust, boil for 45 seconds per side; for a thicker crust, boil up to 2 minutes per side.
Nutrition
- Serving Size: 1 bagel
- Calories: 300
- Sugar: 13.5
- Sodium: 480
- Fat: 4
- Saturated Fat: 2
- Carbohydrates: 58
- Fiber: 3.5
- Protein: 9
Keywords: pumpkin bagels, maple cream cheese, fall breakfast, homemade bagels, pumpkin spice


